I have set up Jetsons twice in recent memory: once for the SUAS competition drone, once for real-time tracking work on the defence side. Both times the model was ready before the board was. Setup is where the schedule quietly leaks, and most of the leak is avoidable. This is the order I follow now.
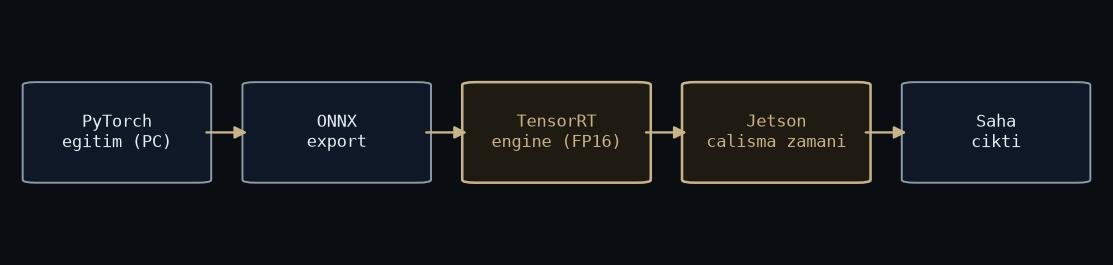
Figure: rendered by me.
Pick the JetPack version before you touch the board
JetPack is not just an OS image. It pins the CUDA, cuDNN and TensorRT versions, and everything you build later stands on those three. So the first question is not “which Jetson”. It is “which TensorRT do I need”, and you walk backwards from that answer to a JetPack release.
Getting this wrong costs real days. A TensorRT engine built against one version will not load against another, so the engine somebody built on a board with a different JetPack is a file, not a deployment. On the SUAS pipeline the target was TensorRT FP16 from the start, so the JetPack choice was made by the export path before the board was even powered. That detector now lives on the UAS vision page.
One practical note: dev kits flash from an SD card image, production modules want NVIDIA SDK Manager, and SDK Manager wants an x86 Ubuntu host. A VM sort of works until USB recovery mode drops mid-flash. If your team runs Windows laptops, arrange a native Ubuntu machine a week early, not the night before the deadline.
First boot: set the power model before you benchmark anything
Out of the box a Jetson does not run at full speed. It boots in a
conservative power mode, and every benchmark you run before fixing that is
fiction. Check the active mode with nvpmodel -q, pick the mode that
matches your power budget, then run jetson_clocks to pin the clocks. Keep
tegrastats open in a second terminal while you load the board: it shows
throttling as it happens, and thermal throttling on a Jetson is silent. No
warning, just fewer frames.
Two smaller items with outsized returns. Put your working data on NVMe if the carrier board allows it, because SD cards are the first thing that dies in the field. And set the fan profile deliberately, because the default is tuned for a desk, not for a sealed enclosure in the sun.
Do not pip install your way to CUDA
The stack that matters ships with JetPack itself: CUDA, cuDNN, TensorRT. Do not try to install those with pip or from random repositories. You will end up with an x86 build that imports cleanly and fails at runtime. PyTorch needs NVIDIA’s aarch64 wheels, not the default ones. The OpenCV that comes from apt is CPU-only, which is fine for most pre-processing. If you actually need the CUDA module, you build it yourself, and I wrote about when that is worth doing in which CUDA are you actually using.
The road to TensorRT
The workflow that survived contact with two projects: train and export ONNX on the desktop, copy the ONNX to the Jetson, build the engine on the device itself. Engines are specific to the GPU and the TensorRT version. Building on target is not a workaround, it is the point.
Build FP16 first. On Jetson hardware it is nearly free, and it does not need the calibration data that INT8 does. Then verify before you celebrate: run a fixed set of images through both the desktop model and the engine, compare the outputs, and only after that talk about speed. That step has enough sharp edges to be its own post: TensorRT and FP16.
A Jetson is not a small desktop. It is a different machine that happens to run Linux. Treat the setup as engineering work, give it its own line in the plan, and the board stops eating your weeks.